Sunday, April 26, 2020

Battle for Mata Nui


This time, I'm going on a bit of a tangent and talking about the 2002 Shockwave game The Battle for Mata Nui. I first opened this game with the help of dirOpener back in February, and I made a post at the time about the strange prototype(?) models used for the Toa. Recently, I ripped the other assets, many of which are copied from Lego BIONICLE (GBA). And when I say "copied", I mean it.


Almost all of the Matoran huts have stray pixels around their border, and these pixels are all the same color as the corresponding pixels in the GBA maps. Keep in mind that Battle for Mata Nui was likely made after Saffire had lost contact with Lego. This suggests that Lego themselves sent maps of the GBA game to the dev team, who kinda sloppily copied and pasted the huts into Macromedia Director.

Looking at the comparison above, you might notice slight variations in shading or color between BfMN and GBA. In order to explain properly, I guess I have to talk about indexing. Indexing is a process that converts a full-color image into an image with a limited number of colors, or palette. When an image is indexed, it loses fidelity, but it takes up waaay less space. Each 8x8 tile in a Game Boy Advance game uses at most 16 colors, and there are at most 16 different 16-color palettes used for the background. In other words, every map in Lego BIONICLE (GBA) uses at most 256 colors.

The Battle for Mata Nui also uses indexed colors. However, everything in each level shares a 256-color palette. Lewa, Kongu, (the Le-Koro version of) Nuhvok, and the Le-Koro backgrounds all use this color palette:

This effectively means that there are fewer shades of each color to choose from. For example, there is no light tan like the one used in the GBA version of the huts, so light green is used as a substitute.

I was hoping that this game would use higher quality versions of the original GBA assets, so to find out the opposite is true is disappointing. That said, there are still some interesting things I'd like to point out.


For starters, I mentioned that "almost all" of the huts were direct copies. The two that buck this trend are in Ga-Koro. The one facing southeast is slightly larger than in the GBA game, and they both seem to have the left tentflap open and the right one closed. My theory is that the dithering (tl;dr: pixel shading) inside the GBA huts didn't translate well to the new color palette, and so parts of these two huts were manually reshaded. During this process, the center tentpole seems to have been misinterpreted as part of the right tentflap.

Many other elements are copied and pasted. Below are the ones that were scaled or otherwise altered. The Le-Koro background is new, but it seems to be made up of trees from the GBA game and in the style of the background in the GBA game.


(As a note for the future, the suva's filename is "itemalther," presumably a misspelling of either "altar" or the Danish "alter".)

Not everything is directly copied from the GBA game, but unfortunately, much of the new content went unused. Here's a sampling of new assets:


Additionally, despite their apparent similarities, most of the tiles do not correspond 1:1 with any elements in the GBA game. This is most notable in Ta-Koro, where the gray ground tiles have no equivalent in Lego BIONICLE (GBA). (Also strange: the Ta-Koro tiles use the prefix "tomb", while the Le-Koro tiles use "lewa" and Ga-Koro uses "gali".)


It's possible that some or all of these "new" assets could be reused from another game, but I would prefer to give the devs the benefit of the doubt and assume they were made specifically for this game. (The destroyed huts alone prove that they had some good artists on board, imo.)

The background color is chosen for maximum contrast and is
otherwise meaningless.

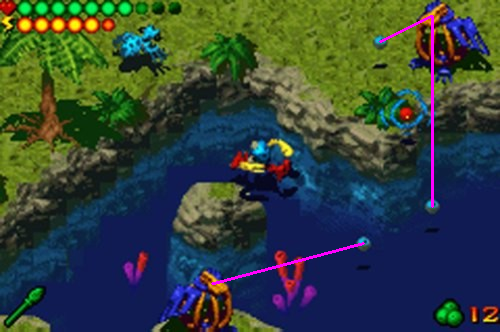
Finally, it looks like each of the "nature powers" in the game was supposed to have an on-screen effect. From left to right: the magnetic force, the magic storm, "itemhintchystal" (admittedly out of place), the fireball effect, and the rust bees. The one piece of behind the scenes info I have is that LEGO vetoed the fireball effect for being too violent. I assume that, rather than replace those two sprites, the devs commented out the effects entirely? (Unfortunately, the tool I used to remove the game's protection can't recover the actual code, so this is just a theory on my part.)


Not to get all misty-eyed over a middling toy promotion game, but it's kinda sad how many of these elements went unused in the final game. If the assets are any indication, I suspect the devs had more ambitious goals than they were able to achieve. Imagine what this game could be like if the Bohrok actually moved around destroying huts instead of spinning in circles next to them...

Anyway, in case you missed the link at the top, all the assets are on spriters-resource now. (nb: the characters are sorted by the names they use internally, including "Wakama" and "Matua".) Feel free to use 'em for whatever you want, with or without credit – just be sure to send me a link when you're done!

Friday, April 10, 2020

Screenshot Inconsistencies

Before I go over the prerelease images one by one, there's something that needs to be addressed. Put simply, I'm not sure they're actual screenshots. Please, stay with me while I break out my corkboard and red marker.


Let's start with an easy one. This screenshot is simply too tall. It's 240x180 (4:3), which is 20 pixels taller than the Game Boy Advance's 240x160 (3:2). There is no evidence to suggest that the GBA was ever intended to use a screen of this size. As far as I can tell, all of the GBA developer kits outputted in 3:2 resolution. (In fact, as far back as 1995, Nintendo was rumored to be developing a handheld console with a 3 inch by 2 inch screen.) It's possible that the game was originally being developed for a different system, but from what I've found, I don't think a single console in 2000/2001 used a 240x180 screen.

The image isn't stretched, either. There are visual artifacts that suggest it's made up of 8x8 tiles, most notably around the edges of the hut in the upper right.


As such, I don't see any way that this could be a legitimate screenshot. But, of course, that doesn't prove that any of the other screenshots are fake, does it?


Let's move on to the Brakas screenshot. This one is odd in a few subtle ways. First, The Unnamed Bird Rahi is in the first frame of its diving animation, and its shadow is offset slightly to the right. In the demo build, the shadow is directly below the bird at all times. Second, the Brakas is dropping a boulder, whereas in the final game it throws Madu fruit. Third, the Brakas sprite here is larger than in the final game:
 
Don't talk to me or my son ever again

None of these things by themselves are proof that this screenshot is fake. All of them could be explained away as minor differences between builds. However, there's something else about this screenshot that I have a hard time justifying. The "camera" is simply too high.


The image above shows the screenshot overlaid on the map as it appears in the final game, with grid lines spaced 8 pixels apart. (The game uses 8-pixel tiles, as is standard for GBA games.) Takua's position on-screen varies between all of these screenshots, but the general rule – as in the final game – is that he's roughly centered on-screen. So it's curious that in this image he appears far closer to the bottom of the screen, especially considering that the camera could easily be one tile lower. For reference, here's how the camera is positioned in the final game when Takua stands in roughly the same spot:


In fact, in the final game, the camera never pans up on this screen. The only way I can see this screenshot being legitimate is if the bottom row of tiles was added later in development – but there's no good reason for the developers to do that.


Let's move on to the other Le-Wahi screenshot. Once again, there's something strange about the birds: they don't have shadows. The easy explanation is that they don't have shadows when they're over empty space, but in the final game, they do:

It's hard to see, but it's there.
 
It's also interesting that the two spiders use the same sprite, just mirrored. The same is true of the birds. If a developer faked this screenshot, it would be easier for them to paste the same sprite twice and mirror one than to copy and paste two different sprites. (I'll grant that I wouldn't find this suspicious if I weren't already looking for evidence of forgery.)


This screenshot is the most complicated to explain. The Volo Lutu Launcher's grapple ball is attached to a bush on the shore, and it has the shockwave effect around it that appears in the final game when the launcher is used. However, we can see that the launcher isn't equipped to either of the shoulder buttons, and Takua is jumping, not being pulled towards the grapple ball.

Three Madu fruits are also on-screen. The logical assumption is that they were thrown by Takua, but the angles they would have to be thrown at seem unlikely:


Considering how fast the Madu fruit moves in the final game, it's practically impossible that the player would be able to throw three of them from such odd angles in such a short duration that they all appear on-screen. A possible solution is that these projectiles come from the large bird Rahi, rather than from Takua:

 
However, Madu fruit thrown by enemies uses a different color palette than if thrown by Takua. Below is a comparison, side by side with the fruit seen in the screenshot:


The left side uses the upscaled but blurry GameReactor screenshot as a base; the right uses the 1:1 scale but jpeg-y IGN screenshot. The Madu fruit in the center with the blue shadow is the kind thrown by enemies, and the one on the right with the dark shadow is the kind thrown by Takua. I'll admit that neither is a perfect match, but the fruit in the screenshot looks closer in color palette to the Takua variant.

As a final note, the two birds use the same sprite, but mirrored, and the Madu fruit all use the same sprite. Once again, this could be evidence that the sprites were copy-pasted.

The natural response to all of this is probably "Jesus, dude, so what?" You see, originally I was planning on analyzing all of these screenshots as if they were accurate representations of what the game looked like at some point, and now that's out the window. I still plan on analyzing them one by one, but now I'll do so in the same way I'd look at concept art. As to why the devs would fake screenshots of their own game, well, look at the GBA developer kits I linked up above. Probably it was easier for them to just paste a few sprites into Photoshop than to take a good-quality screenshot off one of those things. (I mean, they used a camcorder for the demo footage, for goodness' sake.) And, frankly, who would notice?

Anyway, hopefully you can see the merit to what I'm saying, and it doesn't seem like too much of a goofy conspiracy theory. If not, well, I'll gladly accept my role as the community crank.

Next time: something less ridiculous!

Friday, April 3, 2020

Cheat Codes

This game has a bunch of cheat codes. Only six of them were published in cheat books, and they're kind of boring – they just unlock the minigames so you can play them from the main menu. The rest are somewhat more interesting.
 

Credits and SCredits warp you to the full credits and the Saffire credits, respectively. It's unclear why they chose this route as opposed to having a "Credits" option on the main menu, like in the demo.


Saffire warps you to the final lavaboard sequence.

 
Finally, EvilGeorge and DiePinky recolor Takua to use a unobtainable color schemes. This isn't saved, so if you quit and reload your save, Takua will be colored as normal. My best guess is that these cheats were meant to test the contrast of the GBA, to make sure that dark and bright sprites were equally visible on the non-backlit screen. "EvilGeorge" is probably a reference to Takua's development name, George, which was also used internally by Templar Studios while they were making MNOG.

UPDATE 5/25/20: The six codes used to unlock minigames are actually a combination of each Toa's mask and canister codes! For example, Lewa's mask code is 3-LT, and his can code is 154, so the cheat code that unlocks Kewa Bird Riding is 3LT154. This feature is mentioned offhand in early press releases, but not in the game manual or either walkthrough. Weird!

Wednesday, April 1, 2020

Bonus: Monkey MOCup

Earlier today, I sat down and built my Brakas concept. I'm still not convinced that I've got the torso right, but I'm very happy with how this fella looks. For such a basic build, it has a lot of personality! (Obviously the click hinges aren't quite accurate, but they're the same length as the Mata neck piece and they provide much-needed articulation.)

UPDATE: With time, I've grown less and less convinced about the foot torso. It's still a fun build tho


Demo Footage, Part 2


Before I get too far afield, I should probably finish up with the demo video. There's less to say about the second half, but there's still some interesting stuff going on!

00:32: I haven't looked too closely at the minigames yet – I might circle back around to them later. All I have to say at the moment is that you can see the camera (I think?) reflected in the dark part of the screen.


00:37: We cut back to regular gameplay, somewhere in Ta-Wahi. The terrain doesn't match any map in the final game. Takua knocks the masks off a couple of Fikou, and they each spawn a pickup that refills one pip of health. At the risk of repeating myself, this doesn't look like the health pickup in the final game to me.

There are also several lightning ball pickups scattered about. Curiously, collecting these seems to increase the counter displayed in the lower right hand corner of the HUD, next to an image of the energy pickup from the final game. The lightning ball appears in the final game as a projectile launched by the electric spiders in Le-Koro. Perhaps it was used as a stand-in here before the energy pickup's sprites were finalized. It's also interesting that the pickup doesn't seem to replenish energy by itself.

Perhaps energy pickups were intended to be added to the inventory, where they could be used by the player? The unused inventory sprites seem to suggest as much, as would this tip (which only shows up if you talk to a particular Matoran in the tutorial more than once):

This is just an excerpt. The rest is unremarkable.
 
When the Fikous are K.O.ed, a star animation appears over their heads, probably to indicate that they aren't actually dead. In the final game, this animation is used when stunnable enemies are blinded with the firestaff, as well as when a Madu fruit hits Takua on the head.  My guess is that it was done for performance reasons. The game has a real problem with screen tearing when too many objects are loaded into a level, and if every defeated enemy spawned a star animation, that would effectively double the number of objects. Alternately, this could've been changed to better differentiate when an enemy is stunned from when it's defeated.


00:44: A jump cut to a different location in the same map, where Takua uses the firestaff. There's nothing too interesting going on here,  but it does give us a better sense of what the map looked like.

00:49: Cut to Huai Snowball Sling. Again, I have nothing to add here at the moment.

00:57: The titlecard shown in the last few seconds is identical to the one shown in the first few seconds.